
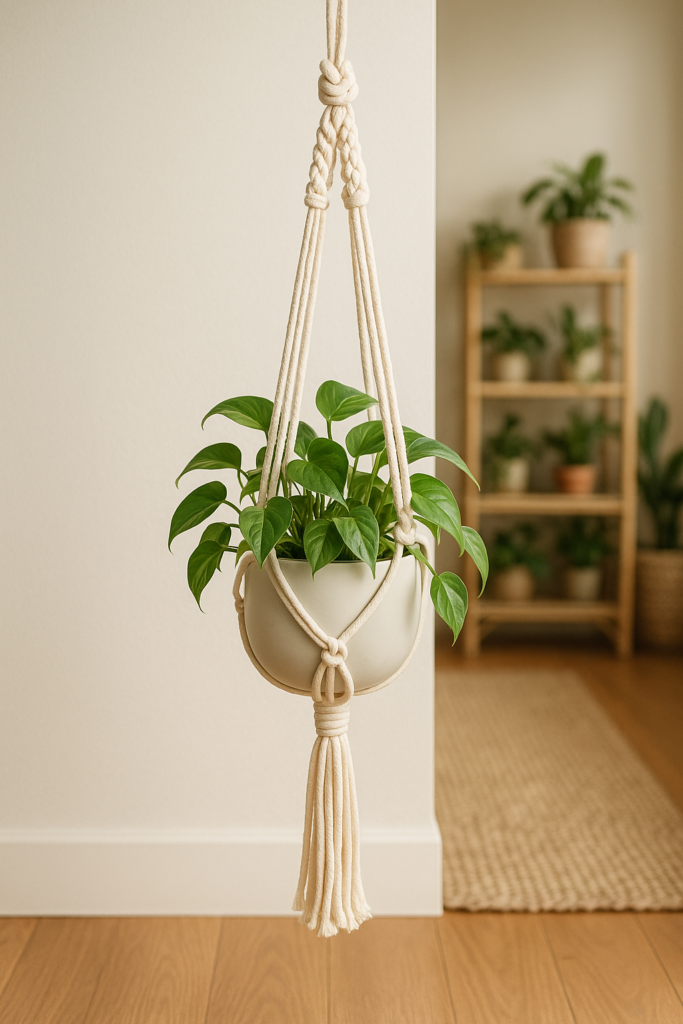
Macrame Plant Hanger Tutorial: Beginner Knots for Modern Boho Decor
You know that moment when you scroll past yet another perfect boho home decor post — hanging plants swaying gently, cords knotted just so — and think, “I could *so* make that”? Yeah. Me too. Every time. Then I open a tutorial, hit step three, and realize half the knots have names like “double half-hitch with a reverse twist” and my plant hanger looks like a nervous spider built it.
So let’s skip the overwhelm. This isn’t about mastering 17 knots before breakfast. It’s about making one beautiful, sturdy, handmade plant hanger — the kind you’ll actually hang in your living room, not stash in a drawer labeled “craft fails.” And it starts with what’s *in your hands*, not what’s in your head.
Materials You’ll Need
Here’s the truth: bad cord ruins everything. Not “kinda stiff” — *ruins*. So grab natural cotton rope, 4mm or 5mm thick. About 100 feet (yes, really — you’ll use most of it). It’s soft enough for your fingers, strong enough for a 6-inch pothos, and frays beautifully for that lived-in boho look.
You’ll also need:
- A wooden ring or dowel — 3 to 4 inches wide works best for balance (and yes, you can sand down a $2 craft-store dowel with 120-grit paper — no fancy tools needed);
- Sharp scissors — fabric shears, not kitchen ones. Blunt snips fray the ends and make knotting harder;
- A tape measure you won’t lose (mine lives taped to the side of my scissors case);
- And — this matters more than you’d think — a healthy 4-inch nursery pot with your favorite trailing plant already in it. Not “eventually.” Now. Because seeing it *hang* is the dopamine hit that keeps you going.
This isn’t DIY macrame as abstract art. It’s indoor plant decor with purpose — something that holds weight, catches light, and makes your space feel intentional.
Basic Knots to Master
Forget “mastering” anything. Just learn two. Seriously.
The square knot? That’s your foundation. Not because it’s fancy — because it’s *predictable*. Pull left over right, then right over left — repeat. It lies flat, grips tight, and doesn’t slip. Think of it as the quiet roommate who always pays rent on time.
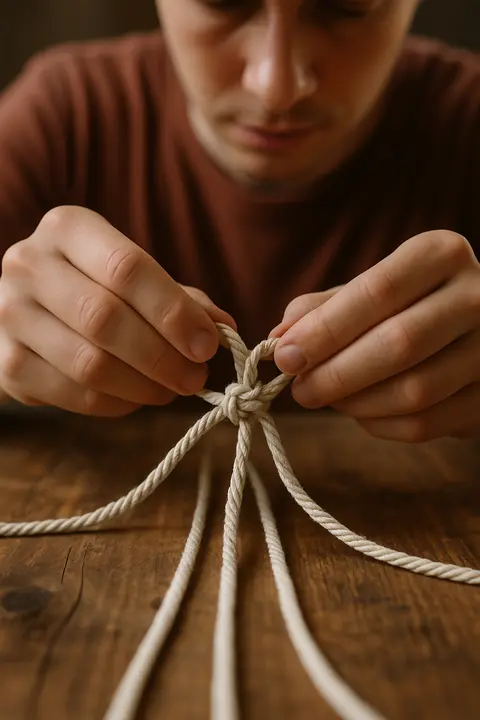
The spiral knot? That’s the one where you tie square knots *without switching sides*. Same starting point every time — left cord always leads. It twists naturally, gives texture, and hides minor inconsistencies (like when your tension wobbles at 11 p.m. after two cups of tea).
Practice them on scrap cord for 10 minutes before cutting your real strands. Your fingers will rebel at first — that’s normal. But by the third row, you’ll start feeling the rhythm. That’s when it stops being craft and starts feeling like conversation between your hands and the rope.
Step-by-Step Guide
No jargon. No “beginner-friendly” euphemisms. Here’s exactly how to build a working, stylish macrame plant hanger — the kind people ask, “Did you *make* that?” (Spoiler: yes, you did.)
- Cut eight 10-foot strands. Fold each in half. Loop the folded end over your wooden ring — pull the tails through the loop, snug but not tight. That’s a lark’s head knot. Do it eight times. You’ll have 16 hanging cords — clean, even, ready.
- Divide those 16 into four groups of four. Each group becomes one “leg” of the hanger — front, back, left, right. Keep them separated with binder clips if your workspace is small (or your cat is invested).
- Starting 6 inches below the ring, tie a square knot in each group — using the outer two cords as “holders,” the inner two as “working” cords. Repeat every 2 inches down, for about 10–12 inches total. This is your top section — the part that carries the weight.
- Now switch to spiral knots for the next 8 inches. Same four-cord group, same leader cord — just don’t swap sides. The twist adds visual interest and helps the hanger drape smoothly.
- At the bottom, gather all four groups together. Tie one tight, fat gathering knot — think of it as cinching a drawstring bag. Trim ends evenly (about 4–5 inches), then gently tease apart the fibers with your thumbnail. A little fray goes a long way toward “modern boho,” not “craft fair reject.”
Hang it. Drop your pot in. Step back. Breathe. That’s not just a hanger — it’s proof you showed up, followed through, and made something real.

Adding a Personal Touch
Once you’ve got the shape down — the rhythm, the hang, the way it moves with air — that’s when personality kicks in.
Try slipping a smooth wooden bead onto two cords before tying a square knot. Or swap in one strand of indigo-dyed cotton for contrast. Or add a tiny tassel at the very bottom — not glued, but knotted in place so it swings freely.

What *doesn’t* work? Overloading it. Three beads, two colors, and fringe on top of fringe reads “trying too hard,” not “handmade with care.” Boho home decor has soul because it’s relaxed — not cluttered.
I added a single brass ring to my second hanger — threaded between two spiral sections — and suddenly it looked like something from a West Coast design studio. Took 47 seconds. Cost $2.49.
Common Questions
How do I choose the right type of cord?
Stick with 100% natural cotton — 4mm or 5mm diameter. It’s forgiving on your hands, knots cleanly, and softens with handling (unlike polyester blends, which stay stiff and squeak when you pull them). Bonus: it’s biodegradable. If you’re making a hanger for a sunroom or porch, go for a cotton-jute blend — stronger against humidity, still easy to work with.
What if my knots are uneven?
They will be. Especially rows 1–3. Unevenness isn’t failure — it’s evidence you’re learning. What matters is consistency *within* each section. If one square knot sits ¼ inch higher than the rest in that row, gently tug the adjacent cords to even it out *before* tightening fully. And if it still bugs you? Trim the whole section and re-knot. Real makers do that. All the time.
Can I use this hanger for larger plants?
Absolutely — but scale smartly. For a 6- to 8-inch pot, double the number of cords (16 strands instead of 8) and use 6mm cord. Add two extra square knot rows at the top for reinforcement, and space your spiral section farther apart — wider gaps distribute weight better. Pro tip: test it first with a bag of rice that matches your plant’s weight. No surprises. Ever.
Final Thoughts
Macrame isn’t about perfection. It’s about presence — noticing how the cord feels, how your wrist turns, how light catches the twist in a spiral knot. That’s why it works so well as indoor plant decor: both require attention, patience, and gentle care.
You don’t need a dedicated craft room or a $200 cord kit. Just 100 feet of good cotton, 45 focused minutes, and one plant you actually like looking at. That’s how you build confidence — not with flawless execution, but with finished things that live in your world.
So hang it. Water the plant. Take a photo (no filter needed). And when someone asks where you got it? Smile. Say, “I made it.” Then hand them this link — because everyone deserves to feel that quiet pride, too.