
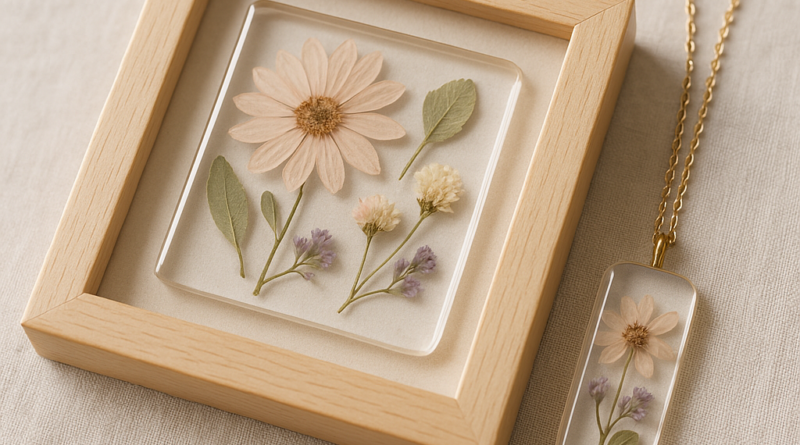
Pressed Flower Resin Art: How to Preserve Blooms in Jewelry and Frames
You know that quiet magic when you open a book and find a pressed violet tucked between the pages? That soft, papery whisper of summer — still vivid, even years later. Pressed flower resin art takes that feeling and locks it into something tangible: earrings you wear to brunch, coasters that catch your friend’s eye, or a tiny frame holding a photo from last spring’s garden walk. It’s not just flower preservation. It’s turning memory into object — and honestly? It’s easier than most people think.
Getting Started with Pressed Flower Resin Art
Forget “artistic talent.” What actually matters is timing, patience, and knowing where to pause. I’ve watched total beginners nail their first resin flower pendant in under two hours — and I’ve seen seasoned crafters ruin three pours because they rushed the tacky layer step. The real trick isn’t skill. It’s rhythm.
Materials You’ll Need
Yes, the list looks long at first glance. But here’s the thing: you’ll reuse most of this stuff forever. Think of it like buying a good chef’s knife — awkward at first, then indispensable. And no, you don’t need industrial-grade gear to start making resin flower jewelry or botanical coasters.
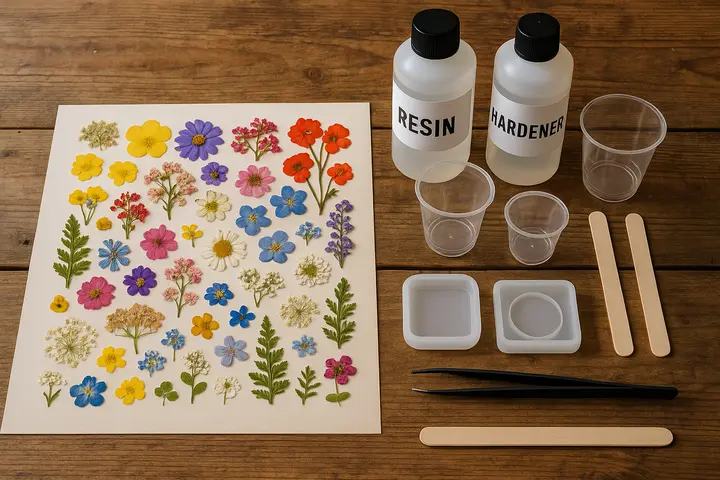
- Resin Kit: Stick with a beginner-friendly epoxy — like EasyCast or TotalBoat Crystal Clear. Skip the “fast-cure” resins for now. They’re unforgiving. You want something that gives you 25–30 minutes of working time (not 5). Bonus if it comes with measuring cups marked in milliliters — eyeballing ratios is how bubbles win.
- Pressed Flowers: Grocery-store pansies work fine. So do backyard violets, lavender sprigs, or even dried fern tips. Just make sure they’re *crisp*, not leathery. If they bend instead of snap, dry them another 2–3 days under heavy books. Moisture = cloudy resin = heartbreak.
- Molds: Start small. Silicone earring molds ($8 on Amazon) are forgiving and let you test colors, placement, and layering without wasting resin. Once you’re confident, move up to coaster or frame molds — but don’t jump there first.
- Protective Gear: Nitrile gloves (not cotton), an N95 mask (not a cloth one), and open windows — or better yet, work outside on a calm day. Resin fumes aren’t “toxic” in tiny doses, but they’ll give you a headache by hour two if you ignore ventilation.
- Tools: A heat gun (a hair dryer won’t cut it), bamboo skewers (cheaper and less staticky than toothpicks), and a silicone mat lined with parchment paper. That last one saves you from scraping hardened resin off your counter for weeks.
Step-by-Step Guide
This isn’t assembly-line crafting. It’s more like baking bread — precise at key moments, flexible in between. Here’s how I walk my students through their first pour:
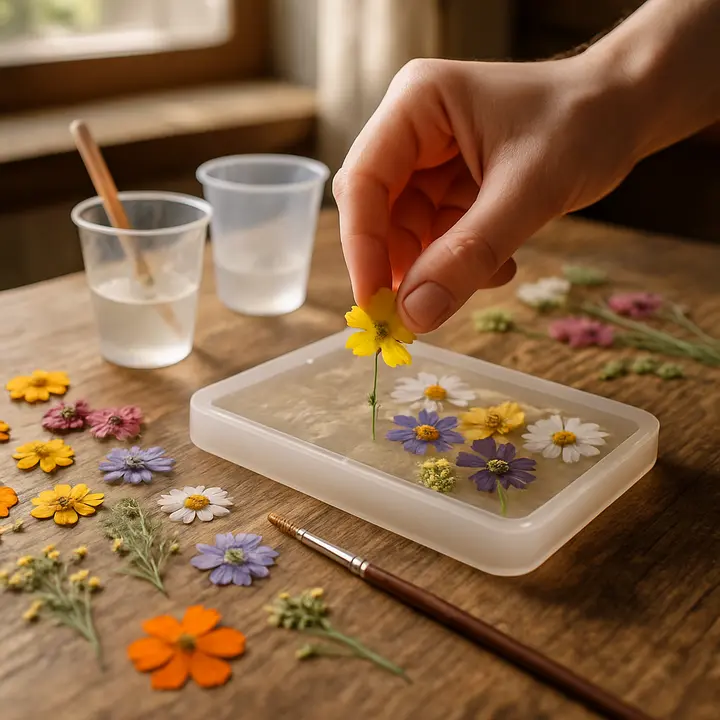
- Prepare Your Workspace: Tape down your plastic sheet so it doesn’t slide. Lay out everything *before* you open the resin bottles. Seriously — I’ve seen people spill half a batch reaching for gloves mid-mix.
- Mix the Resin: Measure *by volume*, not weight — unless your kit says otherwise. Stir slowly for 3 full minutes, scraping the sides and bottom every 30 seconds. Under-mixed resin stays sticky. Over-stirred resin gets frothy. Find the middle ground.
- Pour the First Layer: Aim for 1/8-inch thick. Too thin, and flowers float. Too thick, and bubbles hide in the depths. Let it sit 25 minutes — not 20, not 30 — until it feels like a Post-it note stuck to glass: tacky, but not wet.
- Add the Flowers: Use tweezers. Not fingers. Not toothpicks. Tweezers. Gently lay each petal flat — no curling edges. If a daisy center lifts, press it down *once*, then stop. More pressure = trapped air underneath.
- Pour the Second Layer: Mix fresh resin — never reuse leftover from the first pour. Pour in a thin stream from 6 inches up. This cuts bubbles by half. Then immediately pass the heat gun over the surface — slow, steady, 6 inches away — like you’re warming a crème brûlée.
- Cure the Resin: Cover with a cardboard box (not plastic wrap — condensation ruins clarity). Let it sit untouched for 24 hours minimum. Some resins need 36. Check your bottle — not Google.
- Remove from Mold: Flex the silicone gently. If it sticks, wait 2 more hours. Never pry. Trim excess with a sharp X-Acto blade, not scissors — you want clean edges, not ragged ones.
Tips for Success
Here’s what nobody tells you about beginner resin projects: perfection is the enemy. A tiny bubble near the edge? Call it “character.” A petal that drifted left? That’s where your eye lands first — lean into it. These aren’t flaws. They’re proof it’s handmade.
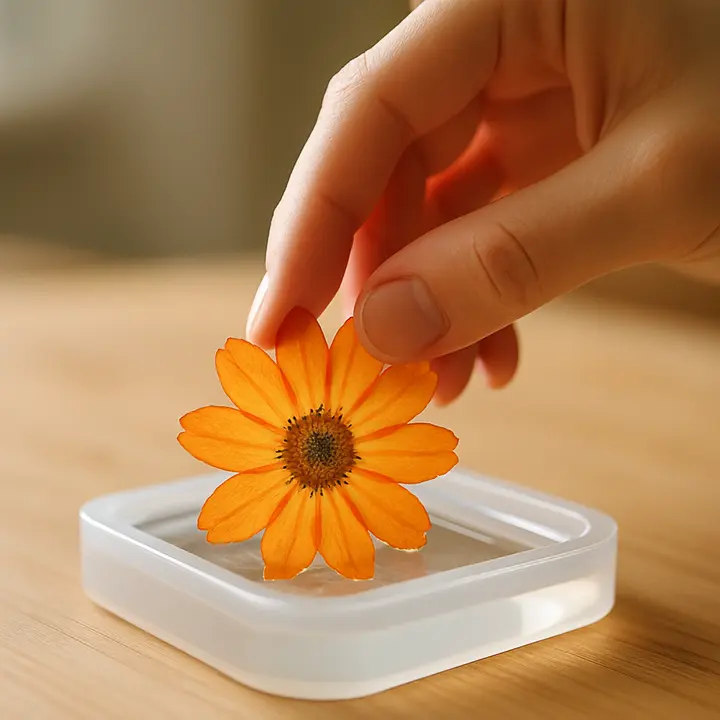
- Use Freshly Pressed Flowers: Not “fresh from the garden,” but “fresh from the pressing book.” Flowers pressed within the last 3–4 weeks hold color best. Older ones fade to parchment yellow — especially pinks and purples. Keep a small stash in a sealed bag with silica gel packets.
- Work in Layers: Two layers isn’t just safer — it’s smarter. The first seals the flowers. The second adds depth. Try pouring the top layer with a drop of blue or amber dye. It makes veins in leaves pop like stained glass.
- Experiment with Colors: Resin dyes are strong. One drop per ounce max — unless you want neon. For floral decor that feels natural, try mica powders instead. They shimmer softly, like morning dew, and don’t overpower the petals.
- Keep It Clean: Wipe tools *immediately* with rubbing alcohol. Dust is the silent killer — it lands while you’re walking to the sink. Turn on a small fan *away* from your workspace to keep air moving — not blowing over your mold.
Creative Ideas and Variations
Once you’ve made three or four successful pieces, your brain starts humming with ideas. That’s when DIY resin art stops being a project and becomes a language. Here’s where people surprise themselves:
- Jewelry: Tiny forget-me-nots in teardrop earrings. Fern tips layered in resin rings. Even single lavender buds in minimalist studs — these sell like crazy at local craft fairs as handmade jewelry gifts.
- Coasters: Go bold. Press whole baby’s breath clusters or dried hydrangea petals. Seal them under thick resin, then sand the edges smooth with 400-grit paper. They feel like river stones — cool, dense, quietly luxurious.
- Frames: Skip the glass. Embed pressed blooms *into* the frame’s border — not the center. Then back it with a printed photo or watercolor sketch. It’s floral decor with emotional weight.
- Keychains: Add a drop of essential oil (lavender, citrus) to the final pour before curing. It’ll release faintly when rubbed — a little sensory surprise in your pocket.
Common Questions
How long does it take for the resin to cure?
Most craft resins hit “demoldable” at 24 hours — firm enough to pop out, but still slightly soft inside. Full hardness? That’s 72 hours. If you try to drill a hole or sand too early, the edge will chip. I always wait three days, then test with a fingernail scratch on the underside.
Can I use any type of flower for resin art?
You can *try* anything — but success varies wildly. Thin, papery blooms like Queen Anne’s lace or cosmos embed cleanly. Thick-petaled roses? They often turn brown at the edges. Succulent leaves? They’ll bubble and cloud unless dehydrated for 10+ days first. Stick with violets, pansies, and dried grasses for your first five projects.
What if I get air bubbles in my resin?
Bubbles aren’t failure — they’re feedback. Most appear in the first 10 minutes. Hit them fast with the heat gun, then walk away. If they reappear later, it’s usually trapped moisture in the flower (see above) or dust settling mid-cure. Next time, pre-warm your flowers on a radiator for 5 minutes before placing them — dry air = fewer surprises.
Final Thoughts
Pressed flower resin art isn’t about making perfect things. It’s about slowing down long enough to notice how light catches the edge of a petal — and then choosing to hold onto that moment, literally, in your hand. Whether you’re building a small business selling resin flower jewelry or just making a birthday gift for your sister, the real reward is in the doing. So grab those violets from the garden path, mix your first batch, and don’t stress the bubbles. They’ll be gone by morning.